
How to Make a Pixel Art Sprite Sheet with AI: One Character, Every Pose
Make a consistent pixel art character with AI: a master sheet, one pose per image, an expression sheet and a clean 128×128 game sprite, with prompts and costs.
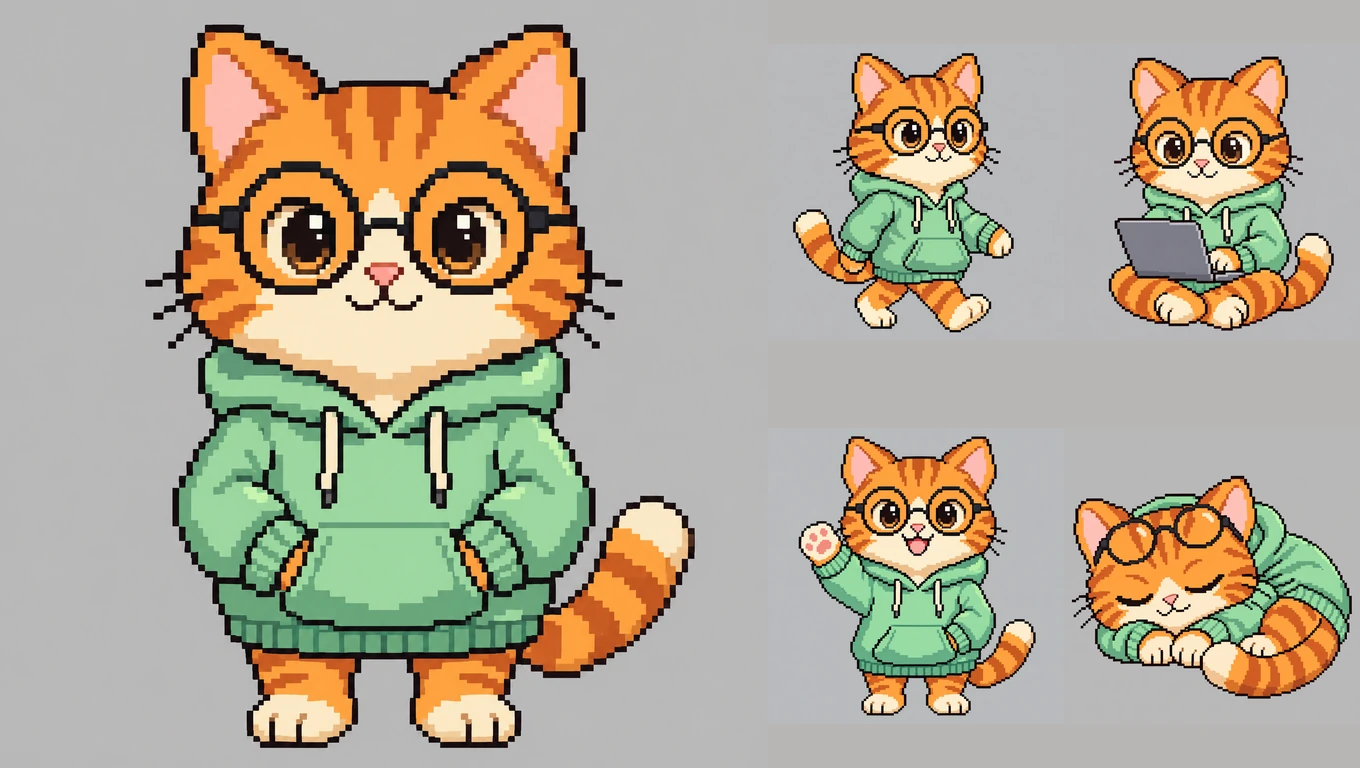
Asking an AI image generator for "a sprite sheet with 12 poses" gets you a nice-looking grid, and then two problems when you try to use it: each pose is too small to cut out cleanly, and the character drifts from one pose to the next. This guide shows the workflow that avoids both. We made Byte, the pixel art cat above, with it in about 15 minutes.
The short version: design the character once as a large "master sheet", then generate each pose as its own image with the master attached as a reference, at 2K and the Standard quality tier or higher. Finally, scale each pose down to a real sprite size such as 128×128 and tidy up a few pixels by hand.
It works for game characters, desktop pets, VTuber chibis and sticker packs. Everything below was made with Image2.5 using GPT Image 2.5.
Why "12 poses in one image" doesn't work
Here's what one prompt for a whole sheet produces:
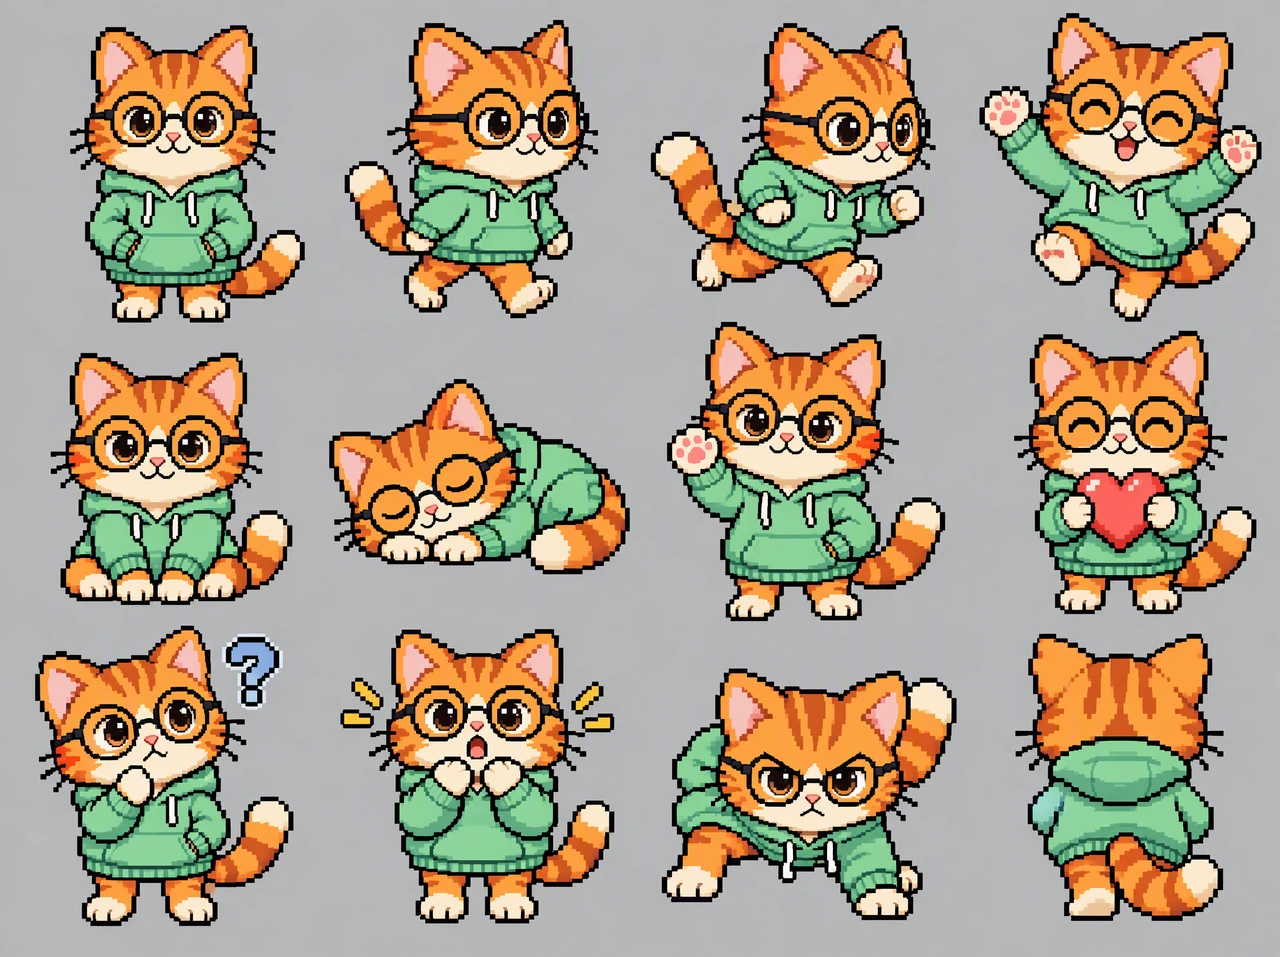
It looks good as a preview. But the image is about 2,200 pixels wide, so each pose gets roughly 550. Cut one out and zoom in, and compare it with the same character generated on its own:
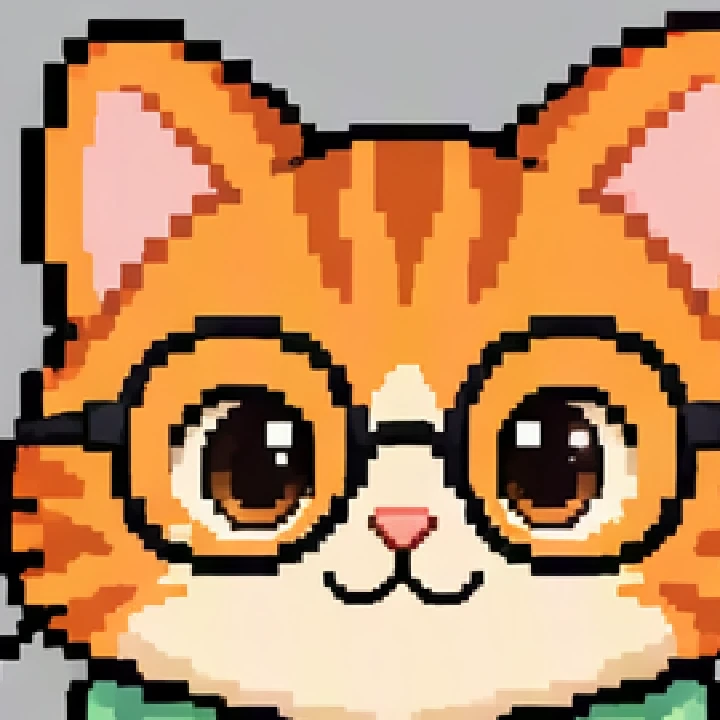
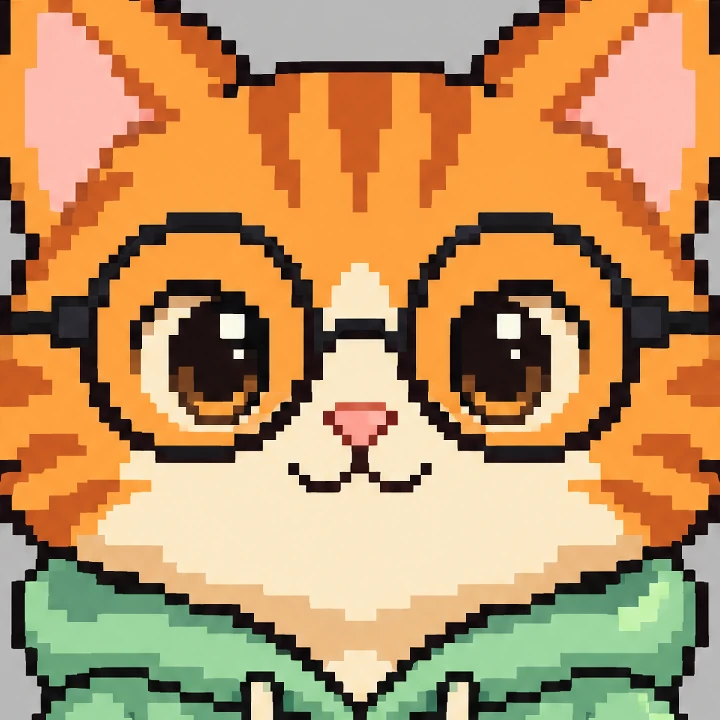
The cut-out has soft, noisy edges and uneven pixel blocks, and it only gets worse with more poses per sheet. A 12-pose sheet is still useful for one thing: trying out a character's look before you commit. For the poses you'll actually use, generate them one at a time.
Step 1: Design the master character sheet
The master sheet is the reference every later image copies, so spend your attempts here. Describe the character's body, outfit, colors and one or two signature details (Byte's are the round glasses and the oversized hoodie), and ask for a single front view on a plain background:
Pixel art character design sheet of an original desktop-pet mascot named Byte: a small chubby orange tabby cat standing upright, wearing an oversized mint-green hoodie with the hood down and round black glasses. Single full-body front view, centered and large in the frame. 32-bit retro game pixel art with crisp square pixels, a clean dark one-pixel outline, a limited palette of about 16 colors and flat shading with one highlight tone. Plain solid light-gray background, no text, no ground shadow.
Try this prompt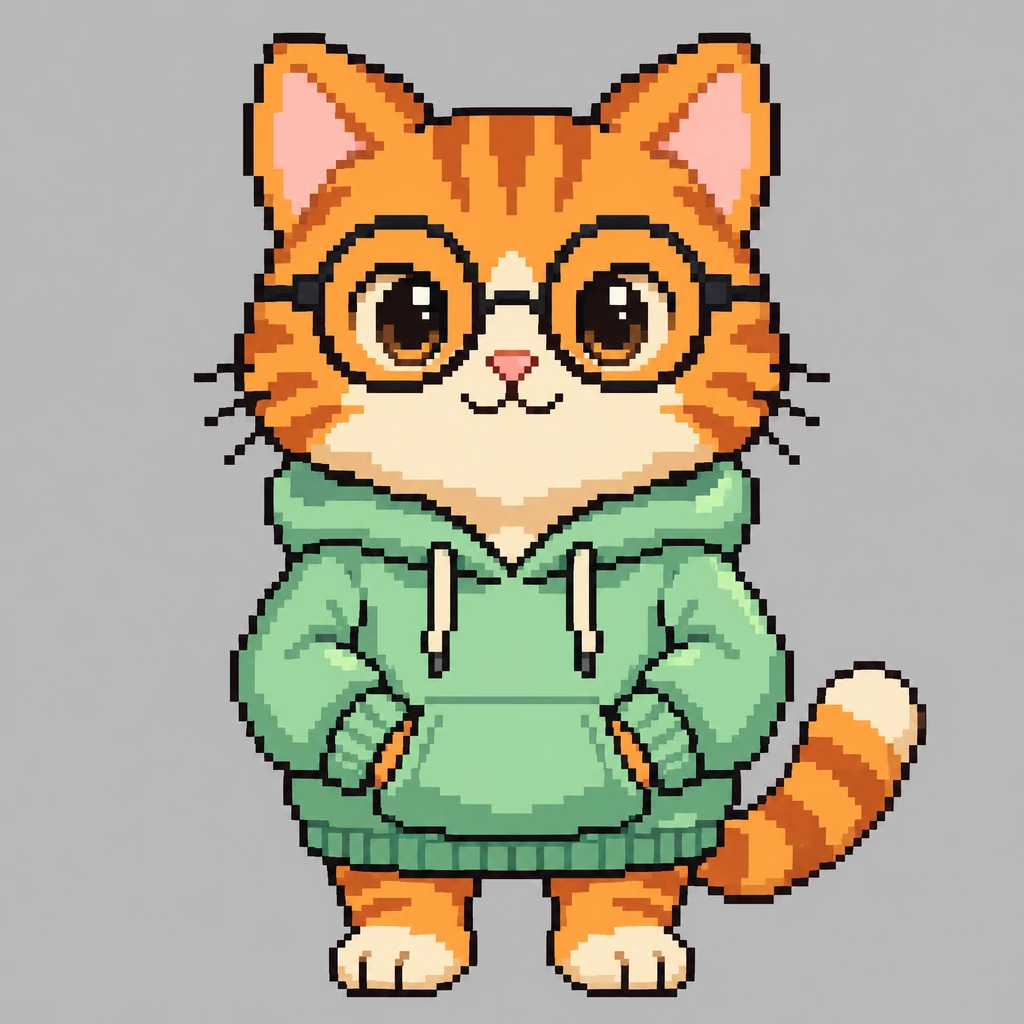
Why each part of the prompt matters:
- "Crisp square pixels", "one-pixel outline", "limited palette" keep it reading as pixel art instead of a smooth illustration.
- "Plain solid background, no ground shadow" makes the character easy to cut out later.
- "Centered and large in the frame" spends the resolution on the character, not on empty space.
- Thinking mode follows long, detailed prompts more closely than Fast mode. It's worth it for the master sheet.
Generate a few versions, pick your favorite and download it. You'll upload it in every step that follows.
Step 2: Pick the quality tier (it matters more for pixel art)
For photos, the Low tier is usually fine. Pixel art is different, because the whole style is hard edges. Here's the same prompt at Low and High, zoomed in:
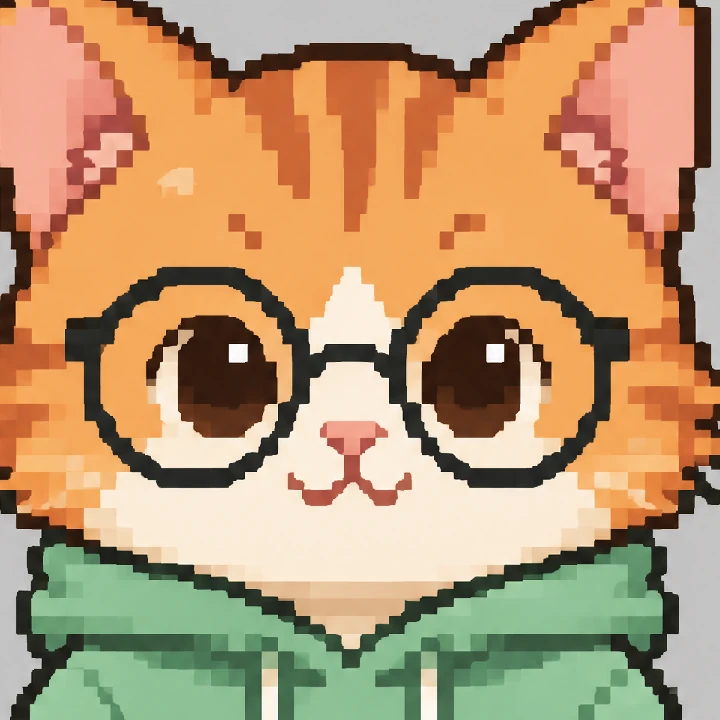
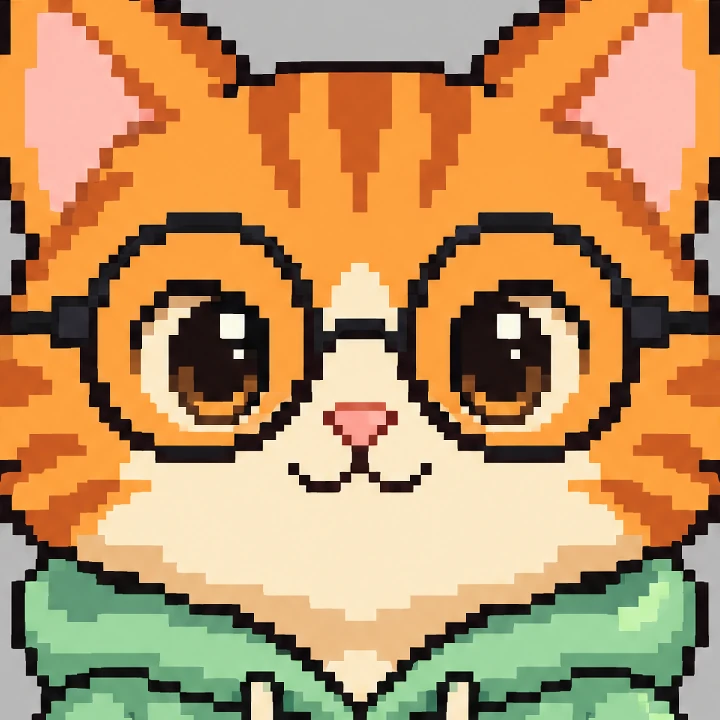
Low gives softer outlines and pixel blocks of uneven size. Standard is clearly sharper than Low; High is the cleanest. What one image costs on Image2.5 at 2K:
| Quality | New image | Edit with 1 reference image |
|---|---|---|
| Low | 4 credits | 7 credits |
| Standard | 8 credits | 11 credits |
| High | 30 credits | 33 credits |
Our pick: 2K at Standard while you experiment, and High for the final versions you'll keep. You set both in the settings menu next to the model picker (for example, "2K · 1:1 · Standard"). The prompt buttons in this guide open with 2K and Standard already selected.
Step 3: Generate each pose separately, with the master attached
Upload your master sheet, then describe only the new pose. The first sentence tells the model what to keep; the last sentence prevents the most common mistakes:
Using the uploaded image as the character reference, draw the same character (same proportions, colors, hoodie, glasses and pixel size) in a new pose: walking to the right, mid-stride, one foot forward and the arms swinging. Single full-body view, centered and large in the frame. Same pixel art style with crisp square pixels, the same dark outline and the same limited palette. Plain solid light-gray background. Exactly two arms and two legs, no extra limbs, no text.
Try this promptThen change only the pose description for each one. These are the four we used:
walking to the right, mid-stride, one foot forward and the arms swingingsitting cross-legged and typing on a small open laptop on its lap, looking at the screencurled up asleep on the ground with eyes closed and the tail wrapped around its body, glasses pushed up on its foreheadstanding and waving hello with its right paw raised high, smiling
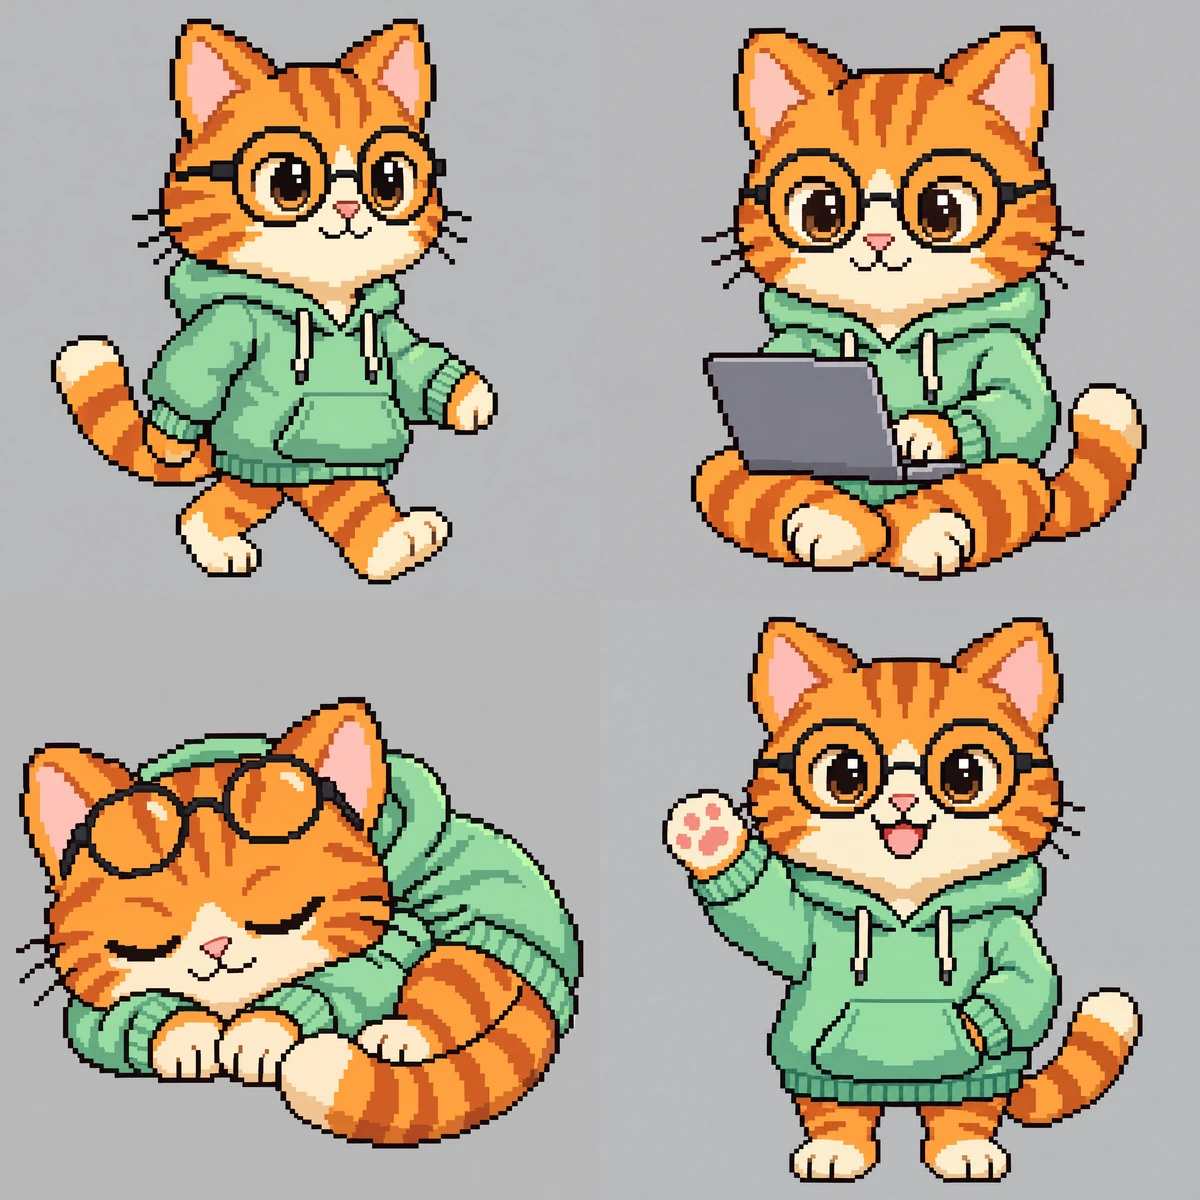
Always attach the master, not the previous pose. If each pose copies the one before it, small changes add up and the character drifts. With the master as the single source, pose 10 matches as well as pose 1.
Step 4: Make an expression sheet
Faces are small, so put four expressions in one 2×2 image of the head and shoulders. Four cells is the sweet spot: each face still gets around 1,000 pixels.
Using the uploaded image as the character reference, make a 2×2 expression sheet of the same character's head and shoulders: happy with eyes closed and a big smile; thinking with a paw on its chin; surprised with wide eyes and an open mouth; sleepy with half-closed eyes. Same pixel art style with crisp square pixels, the same dark outline and the same palette. Each expression in its own cell on a plain light-gray background, evenly spaced, no grid lines, no text.
Try this prompt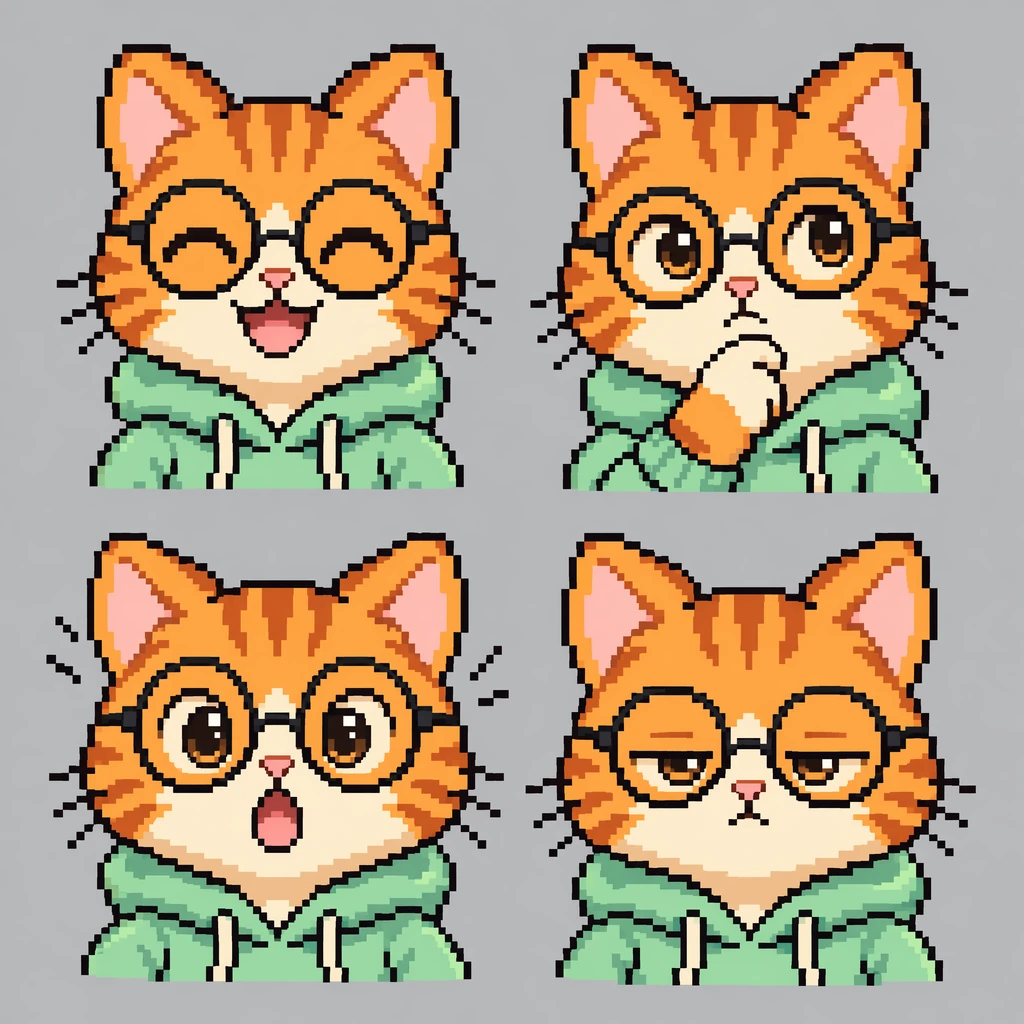
Fixing the usual problems
When a pose comes out wrong, regenerate it from the master with one extra instruction rather than editing the bad result. These are the phrases that fix the common cases:
| Problem | Add to the prompt |
|---|---|
| An extra hand or paw appears | Exactly two arms and two legs, no extra limbs. Describe where each hand is, e.g. left paw in the hoodie pocket. |
| Proportions change (head grows, legs shrink) | Keep the exact head-to-body ratio of the reference. |
| Colors shift between poses | Use exactly the same colors as the reference, no new colors. |
| The face looks off at small size | Make it an expression-sheet cell instead of part of a full-body pose. |
| Edges or small details look blurry | Use the Standard or High tier at 2K, and keep one character per image. |
Step 5: Turn it into a real game sprite
AI pixel art is drawn at high resolution: each "pixel" is really a block of 10 to 20 image pixels, and the blocks don't sit on a perfect grid. That's fine for stickers, thumbnails or a desktop pet shown at large size. For a game engine, convert each pose into a true low-resolution sprite:
- Scale it down to your sprite size (we used 128×128) with Nearest neighbor, not a smoothing filter. Tools like Aseprite, LibreSprite or Piskel can do this; "pixel art fixer" tools do the same and also snap stray colors.
- Reduce the palette to 16 to 24 colors so similar shades merge.
- Clean up by hand: remove the few stray pixels along the outline and close any gaps.
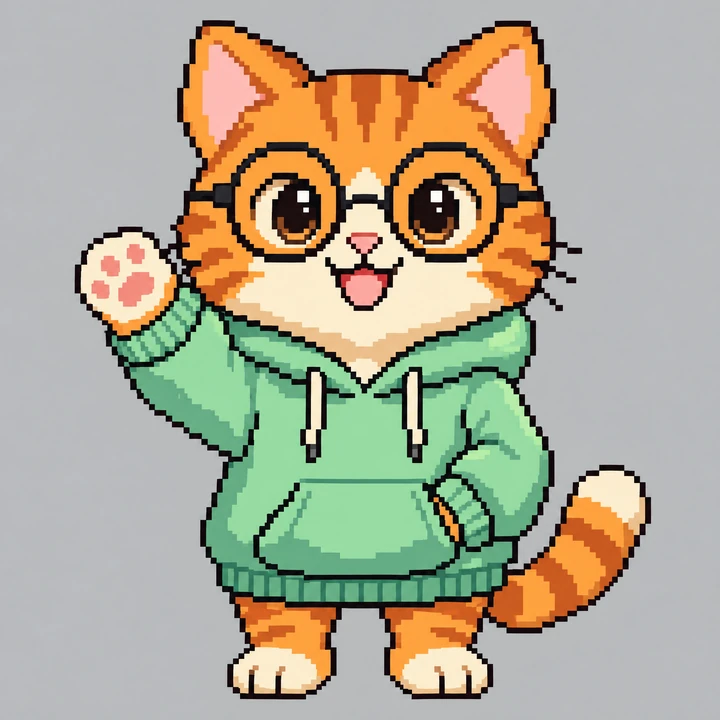
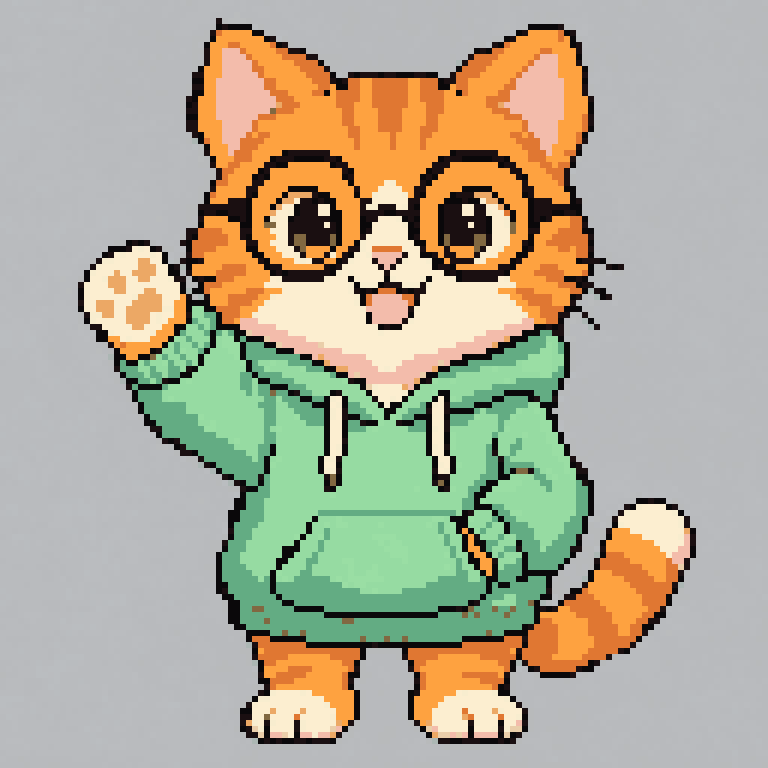
The sprite on the right is the real thing: one color per pixel and a solid outline. You can download it to see what the finished file looks like. Then place your poses side by side on one canvas, or load them into your engine as separate frames.
A note on animation: AI is great at key poses: idle, walk, sit, sleep, wave. Smooth in-between frames for a walk cycle are still easier to finish by hand or in an animation tool, using the AI poses as the keyframes.
What the full set costs
A master sheet, four poses and an expression sheet is six images:
| Setting | Credits for the set |
|---|---|
| 2K, Standard | 8 + 4 × 11 + 11 = 63 credits |
| 2K, High | 30 + 4 × 33 + 33 = 195 credits |
Add a few retries for the master sheet. Each image takes about a minute in Thinking mode.
FAQ
Can I use the sprites in a commercial game? The images you generate are yours to use, including commercially, under our Terms of Service. All paid plans include a commercial license. Make sure your character is original, not a copy of an existing one.
Is this a dedicated sprite sheet generator? No. It's a general image model that's very good at keeping a character consistent from a reference. You get high-resolution key poses; Step 5 turns them into game-ready sprites.
Fast or Thinking mode? Thinking for the master sheet and for poses, where following every detail of the prompt matters. Fast is fine for quickly trying ideas.
Why not ask for a transparent background? A plain solid color is more reliable to remove than an AI attempt at transparency. Delete it with your editor's magic wand, or any background remover.
Ready to make yours? Start with the master sheet prompt above, or open the generator and describe your own character.